Vector Laboratories
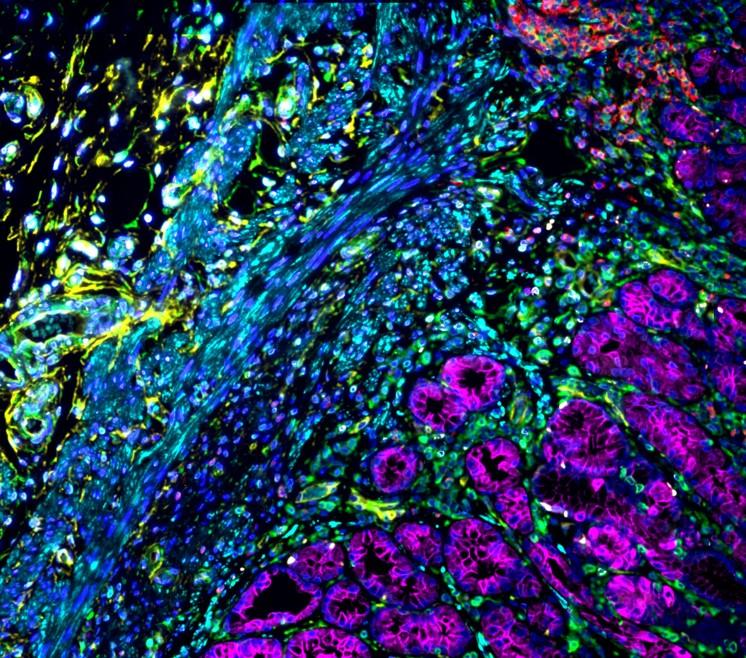
VectaPlex™ Antibody Removal Kit
By Maria Kam Eriksen, BioNordika Denmark
Your path to simplified multiplexing starts with VectaPlex™ Antibody Removal Kit. VectaPlex™ enables re-staining of individual tissue sections without damage to tissue. Unlike other commercial kits or homebrew methods, no tissue damaging heating steps are required. Rapidly advance your research with insights from your tissues through immunofluorescent (IF) or tyramide multiplexing. Introducing VectaPlex™ Antibody Removal Kit to help simplify and accelerate your multiplexing staining process.
Benefits of VectaPlex Antibody Removal Kit
- Removes antibodies and other non-covalently bound reagents from FFPE tissue sections after staining
- Maintains tissue integrity and morphology through multiple cycles of antibody binding and removal
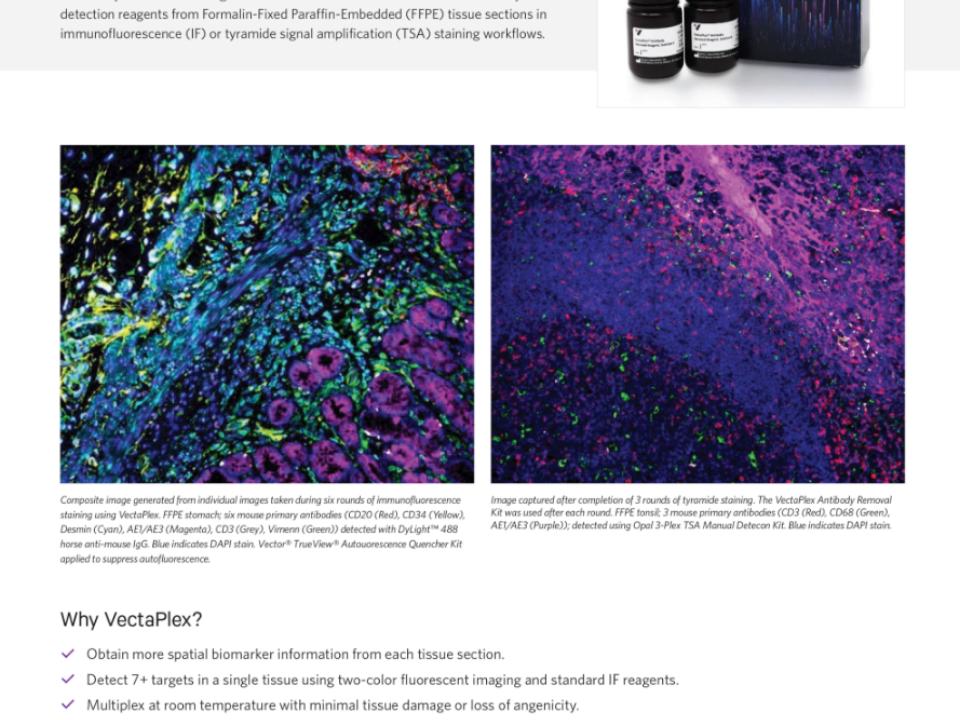
- Enables up to 6 rounds of staining without reducing target availability for multiplex immunofluorescence or tyramide workflows
- Is ready-to-use and does not require a damaging heating step
| Cat. no. | Description | Size | Applications | Target Species | Recommended storage | Format |
|---|---|---|---|---|---|---|
| VRK-1000 | VectaPlex™ Antibody Removal Kit | 125 reactions / 1 kit | Immunofluorescence, Tyramide Signal Amplification | Universal | (15–25° C) | Ready-to-Use |
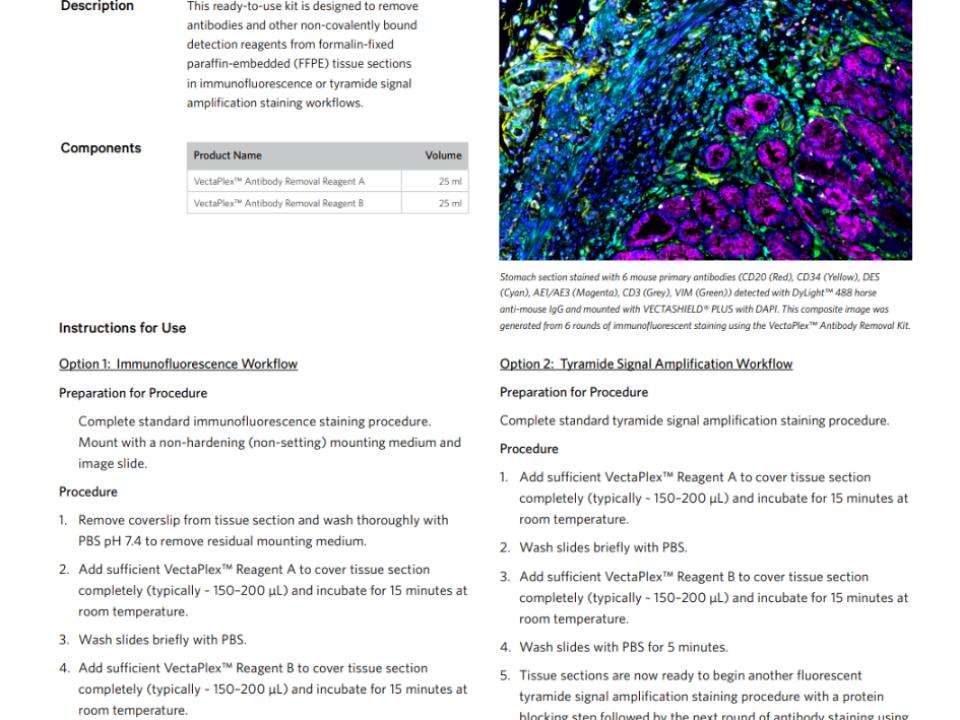
Kit contents:
VectaPlex™ Antibody Removal Reagent A
VectaPlex™ Antibody Removal Reagent B
How to use VectaPlex™ Antibody Removal Kit
Option 1: Immunofluorescence Workflow
- Complete the standard immunofluorescence staining procedure, mount the slide with a non-hardening (non-setting) mounting medium, and image.
- Remove the coverslip from the tissue section and wash thoroughly with PBS to remove any residual mounting medium.
- Add VectaPlex Reagent A to cover the tissue section completely (typically ~ 150–200 μL) and incubate for 15 minutes at room temperature.
- Wash the slides briefly with PBS.
- Add VectaPlex Reagent B to cover the tissue section completely (typically ~ 150–200 μL) and incubate for 15 minutes at room temperature.
- Wash the slides with PBS for 5 minutes.
- The tissue section is now ready to begin another immunofluorescence staining procedure with a protein blocking step followed by the next round of antibody staining, mounting, and imaging.
- Continue repeating these steps until you have detected all desired antigens.
- Note: We recommend using a mounting medium containing DAPI during each staining cycle for the IF workflow to facilitate image alignment
Option 2: Tyramide Signal Amplification Workflow
- Complete the standard tyramide signal amplification staining procedure.
- Add VectaPlex Reagent A to cover the tissue section completely (typically ~ 150–200 μL) and incubate for 15 minutes at room temperature.
- Wash the slides briefly with PBS.
- Add VectaPlex Reagent B to cover the tissue section completely (typically ~ 150–200 μL) and incubate for 15 minutes at room temperature.
- Wash the slides with PBS for 5 minutes.
- The tissue section is now ready to begin another fluorescent tyramide signal amplification staining procedure using a differently colored dye.
- Repeat these steps until you have detected all desired antigens.
- After completing the staining process, mount the tissue sections and capture images.
It is important to note when using the VectaPlex reagents that mixing with bleach may result in formation of a hazardous gas. For this reason, do not mix reagents or waste solutions from this process with bleach, and use reagents in a well-ventilated area using appropriate laboratory personal protective equipment (PPE).
Reach out for more information!